Search

Sunday, September 15, 2013

How to install VMM 2012 SP1 and database on a single server

Hello everybody,

Last week I was only able to write down briefly steps to install VMM environment on a single server. Today, happy to have time, I am going to explain steps in detail.

This is also called as VMM single server deployment scenario. I was waiting VMM 2012 R2 RTM and don't want to use Preview version. therefore,  I decided to use SP1 version this time.
Here are the steps to follow;

1) Installing Windows Server 2012 Ent
2) Installing SQL Server 2012 SP1 and CU5 on the same server (nothing to worry for a test environment)
3) Installing VMM 2012 SP1 and Use a secondary disk for VMM library
4) Installing VMM 2012 SP1 UR3 on top of them


1) Installing Windows Server 2012 Ent
For this blog I wont go through this step not to get it long.

2) Installing SQL Server 2012 SP1 and CU5 on the same server

I will use a dedicated Enterprise SQL 2012 SP1 server. SP1 and CU5 is not mandatory, I just wanted to test it, also.

The first thing you should do is to install .NET Framework 3.5 from Features on Server 2012 Console. Probably you will get an error (http://support.microsoft.com/kb/2734782/en-us). Therefore, you will need to enable it from a command prompt.

Mount installation ISO to d: drive and run the following;
dism /online /enable-feature /featurename:NetFx3 /source:d:\sources\sxs /all

Now we are ready to start installation of SQL server;

Start setup.exe and after passing requirements tests check the following options, maybe you want more to select for testing;


Select default instance and default installation path;


3) Installing VMM 2012 SP1 and VMM Library

You have to complete some prerequisites to be able to install VMM;

1-Creating users and a user group

domain\scvmmadmintest
domain\scvmmsvctest
domain\sqlsvctest
A new Global-Security group: VMMAdmins_test

Add domain\scvmmadmintest and domain\sqlsvctest to VMMAdmins_test group created.


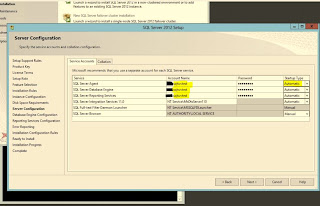
Integration services, full text search and reporting services are not mandatory, I choose them for testing purpose.  Use the "Domain\sqlsvctest" account for SQL Agent and Database Engine. You may choose to use different accounts for other services as you wish.
 
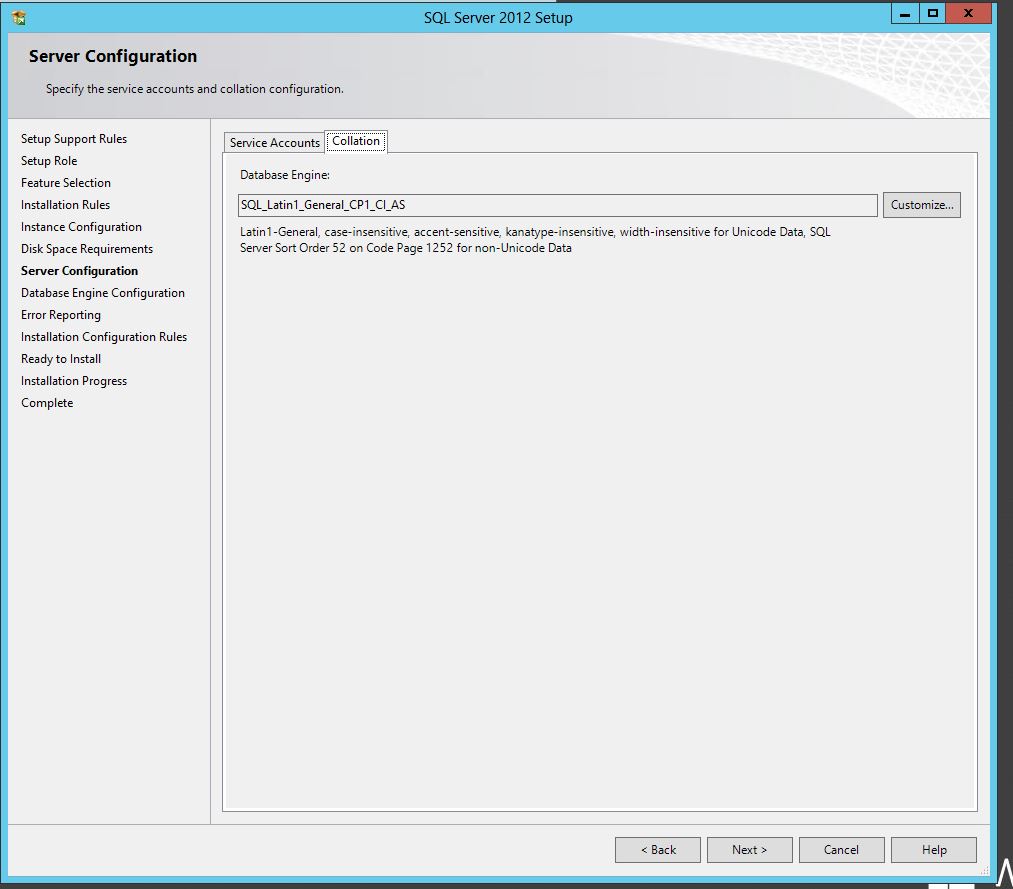
Select collation as "SQL_Latin1_General_CP1_CI_AS"
 
Select "Windows Authentication" and add VMM admins group to SQL administrators. Of course this is for test. You better add only SQL admin here.
 
 
After agreeing next steps finalize the SQL installation. I installed CU5 which was the latest Cumulative Update for SP1 at that date.
 
If you query from SQL management studio with "select @@version" you will get;
 
Microsoft SQL Server 2012 (SP1) - 11.0.3373.0 (X64)
 Jun 29 2013 21:15:12
 Copyright (c) Microsoft Corporation
 Enterprise Edition (64-bit) on Windows NT 6.2 <X64> (Build 9200: ) (Hypervisor)
You may restart your server if desired. I am using hyper-v therefore I took a snapshot at this point before continuing to VMM installation.
 
2-Installing "Assessment and Deployment Kit"

Download  Windows Assessment and Deployment Kit (ADK) for Windows® 8 from http://www.microsoft.com/en-us/download/details.aspx?id=30652 
check only the “Deployment Tools” and “Windows Preinstallation Environment” options.


3-Installing "SQL 2012 Native Client" and "SL 2012 Command Line Utilities"
On the server install the SQL 2012 Native Client and the SQL 2012 Command Line Utilities from
http://go.microsoft.com/fwlink/?LinkId=253555

4) Installing VMM 2012 SP1 and UR3

Installation of VMM 2012 SP1 is as follows;
 
Log on using your domain user account that is a member of the "VMMAdmins_test" group.
Run Setup.exe
Click Install
Select both "VMM Management Server " and "VMM Console"

Accept or change the default install path and click Next. (I had chosen default path)
Enter the server name of SQL server which is the same server (localhost) for our installation. Leave other areas empty and continue.


On the Account Configuration screen, enter the domain account for the VMM service account that you created earlier (DOMAIN\scvmmsvctest). Leave the default to store encryption keys locally for this simple deployment.


On the Port configuration step, accept defaults


for the final step ,on the Library configuration screen, change the library path or accept the default location (I used a 150GB secondary disk for Library on D:)
 
 
Setup will finish soon and you will be able open VMM console for the first time.

4) Installing VMM 2012 SP1 UR3

Using the link http://support.microsoft.com/kb/2836751/tr?lc=1055  download;

Virtual Machine Manager Administration Console Update (KB2858509)
Virtual Machine Manager Server Update (KB2858510)
Virtual Machine Manager Guest Agent Update (KB2858511)
 
 
Install UR3 "server update" and "console update" respectively on VMM server. You will use guest agent update after deploying some virtual machines.
 
Thats all folks!.

Bare metal deployment with VMM 2012 SP1 using HP ILO

Last week I tried to bare metal deploy a Windows Server 2012 to a HP DL 380 G6 server with ILO 2 which will be a Hyper-V host ended successfully.

The main points in this kind of deployment is configuring hardware and software in a way that they work as expected.

For HP hardware you need to configure BIOS settings to enable boot from a network adapter by changing the boot order and selecting "enable" from LAN adapter settings.

On VMM side first you have to integrate VMM and SCCM for booting the HP server with F12 key and loading the boot.wim. To do this on VMM console add PXE server on fabric tab (here is your SCCM Server) which is so simple.

On fabric Tab click PXE servers on the left side and click "Add PXE Server". Enter the Computer name of the SCCM server and select a user Runas account able access SCCM. You can create a new one by clicking browse and add "Create Runas Account".


You will a VHD file to do a bare metal deployment in VMM. Therefore, the next step is preparing a VHD file for installing an operating system. I installed a Windows Server 2012 and sysprepped it for getting its VHD file to use, after that, imported it to VMM Library for future use.

To sysprep an operating system;

Go to "C:\windows\system32\sysprep\" and run "sysprep" as administrator. Select as seen on screenshot.


To import a VHD to VMM library first select "Import Physical Resource" icon on upper side of console, click add resource


Next you will need to built a host profile in VMM as follows;


After completing the hyper-v Host profile next step is to add a resource (in this example Hyper-v Host);


Open ILO console and wait for F12 prompt and press as soon as possible :)You will see DHCP offer and boot.wim followed by a VMM installation window. After that all you need to do is wait till installation completes:)

You better look at links below for everything about VMM and bare metal deployment;

http://www.hyper-v.nu/archives/hvredevoort/2011/11/how-to-bare-metal-deploy-a-hyper-v-server-via-vmm2012-and-hp-ilo/

http://www.hyper-v.nu/?s=bare+metal+deployment

Friday, August 23, 2013

Windows update error 80072ee2

If you see this error during online Windows Microsoft update with red cross check for the "trusted sites" settings on Internet explorer whether URL's below added in the exceptions list or not ;
  1. http://*.update.microsoft.com
  2. https://*.update.microsoft.com
  3. http://download.windowsupdate.com
Furthermore, in my case, URL's were added but when I checked proxy settings I find out that it is enabled. After disabling proxy everything went fine.

Monday, August 19, 2013

Basically monitoring port scan with SCOM

Hello,

I was thinking if monitoring port scan attacks with SCOM is possible and I have found a link to build a customized script for a unit monitor in SCOM.

Using the link
http://operatingquadrant.com/2009/08/13/scom-locallly-monitoring-a-listening-tcp-port/

I Customized the script and created a new unit monitor targeted to "windows computer" class. "a" here represents the number of "SYN_SENT" lines returned from netstat command. If "a" is less than 5 in 2 minutes interval (given as a parameter for scheduling of the monitor) monitor will raise an alert.

http://netsecurity.about.com/cs/hackertools/a/aa121303.htm will be helpful to understand why I used "SYN_SENT" for netstat. Of course more detailed monitor can be build where this script should be accepted as a starting point.

Here is the full script for the unit monitor;
-------------------------------------
Option Explicit
Dim nPortToCheck, scmd, sPortQryPath

Dim oAPI, oBag, oArgs, objshell, objExec, oStdOut, a
Set oAPI = CreateObject("MOM.ScriptAPI")
Set oBag = oAPI.CreatePropertyBag()

Dim sLine, bl_Healthy, sMesg

sCmd = "netstat -ano"
set objShell = CreateObject("Wscript.shell")
set objExec = objShell.exec(sCmd)
set oStdOut = objExec.stdout

a=0

Do until oStdOut.AtEndofStream
sLine = ""
sLine = oStdOut.ReadLine
if instr(sLine, "SYN_SENT") > 0 and instr(sLine,":" & nPortToCheck) then
a=a+1
end if
loop

if a<5 then
sMesg = "no problem"
Call oBag.AddValue("Status","OK")

Else
sMesg = "Port scan alert"
Call oBag.AddValue("Status","Error")
End if

Call oBag.AddValue("Message",sMesg)
Call oAPI.Return(oBag)
set oBag = nothing
set oAPI = nothing
------------------------------------------

have a nice day! :)

Sunday, August 18, 2013

Automatically creating scheduled change request workflow with powershell using scsm authoring tool

Last week I got rid of creating windows update change requests every month for every product  in SCSM. Therefore I decided to create a workflow for automatically creating scheduled change requests using powershell.

We use templates for change requests in our SCSM environment.

According to our needs ;

- Filling areas left empty after standart change template applied which are activity implementer, CI's, parent CR child RA and MA descriptions, created by and most importantly planned start and end dates.
-Keeping this script in a  management pack (you will need SCSM authoring tool to create a scheduled workflow)
-Chance to able to enable and disable this workflow when needed

After a deep search in google we have found some usefull powershell codes and smlet commands below;

SCSM: Set Scheduled Start and End Date in Manual Activites of CR via Powershell: http://gallery.technet.microsoft.com/scriptcenter/SCSM-Set-Scheduled-Start-29ce12d3

apply template to change request object via powershell: http://social.technet.microsoft.com/Forums/systemcenter/en-US/7072bf58-e677-4329-bb40-996bd8052a24/apply-template-to-changerequest-object-via-powershell Creating recurring Change Requests: http://www.scsm.se/?p=239

Using SCSM to Automatically Create Work Items. Specifically: Change Requests!: http://www.netiviaconsulting.com/2012/05/08/using-scsm-to-automatically-create-work-items-specifically-change-requests/

and also Automatically Creating Incidents Periodically: http://blogs.technet.com/b/servicemanager/archive/2009/10/21/automatically-creating-incidents-periodically.aspx

Add a Implementer to Manual Activity via PowerShell: http://gallery.technet.microsoft.com/scriptcenter/SCSM-Add-a-Implementer-to-74443a8f

I have 1 RA and 2 MAs in my template therefore code is arranged according to our needs. After all combined and modified I got the powershell code below ;
--------------------------------------------
Import-Module Smlets

$CrClass = Get-SCSMClass |?{$_.name -eq "System.WorkItem.ChangeRequest"}

$o = ""

$Params = @{

ID="CR{0}"

Title = "your title"

Description = "your description"

Reason = "your reason"

ScheduledStartDate=[datetime]::utcnow

ScheduledEndDate=[datetime]::utcnow.AddHours(3)

Area = "Operations"

Priority = "Medium"

Impact = "Standard"

Risk = "Medium"


}
 
$o = New-SCSMObject -Class $CrClass -PropertyHashtable $Params -pass


#-------adding description to standart change---------
$changeRequest = Get-SCSMObjectProjection System.WorkItem.ChangeRequestProjection -filter "Id -eq '$o'"

$template = Get-SCSMObjectTemplate Template.700f759a82014344bc0bb2b732e95b47 #(template ID got from custom template MP used)

$changeRequest.__base.ApplyTemplate($template)

$changeRequest.__base.Commit()


#-------adding "created by user" to CR----------------
$CreatedByRelClass = Get-SCSMRelationshipClass System.WorkItemCreatedByUser

$ChangeReq = Get-SCSMObject $CrClass|?{$_.Id -eq $o}

$UserClass = Get-SCSMClass System.Domain.User

$CreatedByUser = Get-SCSMObject $UserClass|?{$_.UserName -eq "borgamentes"}

New-SCSMRelationshipObject -RelationShip $CreatedByRelClass -Source $ChangeReq -Target $CreatedByUser -Bulk


#-------------adding description into RA------------------
$WIContainsRAActivityRel = Get-SCSMRelationshipClass -Name System.WorkItemContainsActivity

$AllCRActivities = Get-SCSMRelatedobject -SMObject $o -Relationship $WIContainsActivityRARel

$RActivities = $AllCRActivities | where {$_.ClassName -eq "System.WorkItem.Activity.reviewActivity"}

$RAdescription="SCSM update2"

$RAID=$RActivities.Id

Set-SCSMObject -SMObject (Get-SCSMObject (get-SCSMClass System.WorkItem.activity.reviewactivity) -Filter

"Id -eq $RAID") -Property 'Description' -Value $RAdescription


#-------------filling empty areas left in MA's------------------
$MActivities = $AllCRActivities | where {$_.ClassName -eq "System.WorkItem.Activity.manualActivity"}

$MAdescription1="SCSM MA1 update"

$MAdescription2="SCSM MA2 update"

$MAProp1 = @{

Description = "your description"

Area = "Software"

ScheduledStartDate=[datetime]::utcnow

ScheduledEndDate=[datetime]::utcnow.AddHours(3)

}
$MAProp2 = @{

Description = "your description"

Area = "Software"

ScheduledStartDate=[datetime]::utcnow

ScheduledEndDate=[datetime]::utcnow.AddHours(3)

}
$ActivityImpRelClass = Get-SCSMRelationshipClass System.WorkItemAssignedToUser

$MAUserClass = Get-SCSMClass System.Domain.User

$MAActivityImplementer = Get-SCSMObject $MAUserClass|?{$_.UserName -eq "borgamentes"}

New-SCSMRelationshipObject -RelationShip $ActivityImpRelClass -Source $MActivities[0] -Target $MAActivityImplementer -Bulk

New-SCSMRelationshipObject -RelationShip $ActivityImpRelClass -Source $MActivities[1] -Target $MAActivityImplementer -Bulk

$configItem= get-SCSMRelationshipClass System.WorkItemAboutConfigItem

$computerclass = Get-SCSMClass |?{$_.Name -eq "Microsoft.windows.computer"}

$computername1 = Get-SCSMObject $computerclass|?{$_.PrincipalName -eq "fqdn of the first CI"}

$computername2 = Get-SCSMObject $computerclass|?{$_.PrincipalName -eq "fqdn of the second CI"}

$computername3 = Get-SCSMObject $computerclass|?{$_.PrincipalName -eq "fqdn of the third CI"}

New-SCSMRelationshipObject -RelationShip $configItem -Source $MActivities[0] -Target $computername1 -Bulk

New-SCSMRelationshipObject -RelationShip $configItem -Source $MActivities[0] -Target $computername2 -Bulk

New-SCSMRelationshipObject -RelationShip $configItem -Source $MActivities[0] -Target $computername3 -Bulk

New-SCSMRelationshipObject -RelationShip $configItem -Source $MActivities[1] -Target $computername1 -Bulk

New-SCSMRelationshipObject -RelationShip $configItem -Source $MActivities[1] -Target $computername2 -Bulk

New-SCSMRelationshipObject -RelationShip $configItem -Source $MActivities[1] -Target $computername3 -Bulk

$MAID1=$MActivities[0]

Set-SCSMObject -SMObject (Get-SCSMObject (get-SCSMClass System.WorkItem.activity.manualactivity) -Filter "Id -eq $MAID1") -PropertyHashtable $MAProp1 -pass

$MAID2=$MActivities[1]

Set-SCSMObject -SMObject (Get-SCSMObject (get-SCSMClass System.WorkItem.activity.manualactivity) -Filter "Id -eq $MAID2") -PropertyHashtable $MAProp2 -pass


remove-module smlets


---------------------------------------------


When you try to run the script from powershell command windows you will see its working fine but to run it through a custom MP you have to modify your custom template MP.

For RA;
<Property Path="$Context/Property[Type='CustomSystem_WorkItem_Activity_Library!System.WorkItem.Activity']/Id$">RA{0}</Property>

and for MA's ;
<Property Path="$Context/Property[Type='CustomSystem_WorkItem_Activity_Library!System.WorkItem.Activity']/Id$">MA{0}</Property>

Then you can save your project in SCSM Authoring tool.  Still the work is not competed. Final step is to copy both the .DLL authoring tool and MP created to SCSM installation directory and import it.

All done! :)